Basic Usage
Following installation into your VRChat avatar project, let’s take a look at typical usage of Make It MMD.
Describing MMD morphs
Let’s get started setting up Make It MMD!
If you’re more familiar with Unity concepts, you can skip straight to the next section.
Basic concepts
In order to attach behaviors to VRChat avatars, we use various Unity components.
For example, we use a “VRC Avatar Descriptor” component to describe the basics of our avatar. What’s the left eye? What’s the right eye? How is the mouth controlled? What’s the center point we “look” from when we use the avatar?
Then, we might use a “VRC Phys Bone” component to describe in-game motion of our avatar. From swaying hair and flowing clothes, to wagging tails and drooping ears, these components let us tell VRChat how pieces of our avatar should move.
Once you’ve installed Make It MMD in your project, you gain access to a new “MIM Make BlendShapes” Unity component.
Attaching a “MIM Make BlendShapes” component to your avatar lets you describe what facial expressions on your avatar correspond to various “MMD morphs”.
In the world of MMD, each facial expression has its own fixed name called a morph, whereas different VRChat avatars could have completely different names for their own facial expressions!
Hence, to make your avatar work in MMD worlds, we’ll first need to describe what facial expressions in your avatar matches what.
Let’s add the component to get started.
Adding the Unity component
To add a “MIM Make BlendShapes” component, we’ll need an object we can place it in.
Anywhere works, but we recommend you create a new object called “MMD” inside your avatar. This way, your MMD-related settings are centralized into one place.
Follow the below steps to create the new object and add the “MIM Make BlendShapes” component:
-
First, find your avatar in the hierarchy. Right-click it, and click “Create Empty”.
-
Your new object will be created, by default called “GameObject”. Rename it to “MMD”, or any other name if you prefer.
-
With your new object still selected in the hierarchy, click “Add Component” in the Inspector.
-
In the search box, start typing “MIM Make BlendShapes”. Select it in the list to add the component.
Opening the editor
Now that you’ve added “MIM Make BlendShapes” to your avatar, you’re ready to start matching your avatar’s facial expressions to MMD morphs.
Follow the bellow steps to start using the editor:
-
Inside the “MIM Make BlendShapes” component you created earlier, click the “Open Editor” button.
-
After Make It MMD loads your avatar’s expressions, the editor window will open.
-
Click the name of any MMD morph along the left side of the window to select it.
-
You should see previews of your avatar’s facial expressions.
-
If your avatar’s face is too small or not visible, try moving the preview of your avatar around in the main Unity window until the preview shows just the face. Then click on the Make It MMD editor window again to reload the previews.
Setting the right MMD facial expressions
Now that the Make It MMD editor is ready for you to use, you’ll need to decide which MMD morphs match your avatar’s facial expressions.
There’s also a lot of MMD morphs, some of which might not match what’s available on your avatar!
Thankfully, you don’t have to set all of these.
At minimum, we recommend:
- The Japanese “AIUEO” vowels
- A: あ
- I: い
- U: う
- E: え
- O: お
- Eyes
- One eye blink: まばたき
- Closed smiling: 笑い
- Eyebrows
- Saddened: 困る
- Angry: 怒り
- Wink: ウィンク
- Up: 上
- Down: 下
This should give you coverage for expressions used 25% or more of the time. (Raw data source)
For further coverage, we recommend referencing Xoriu’s MMD Facial/Expression Chart.
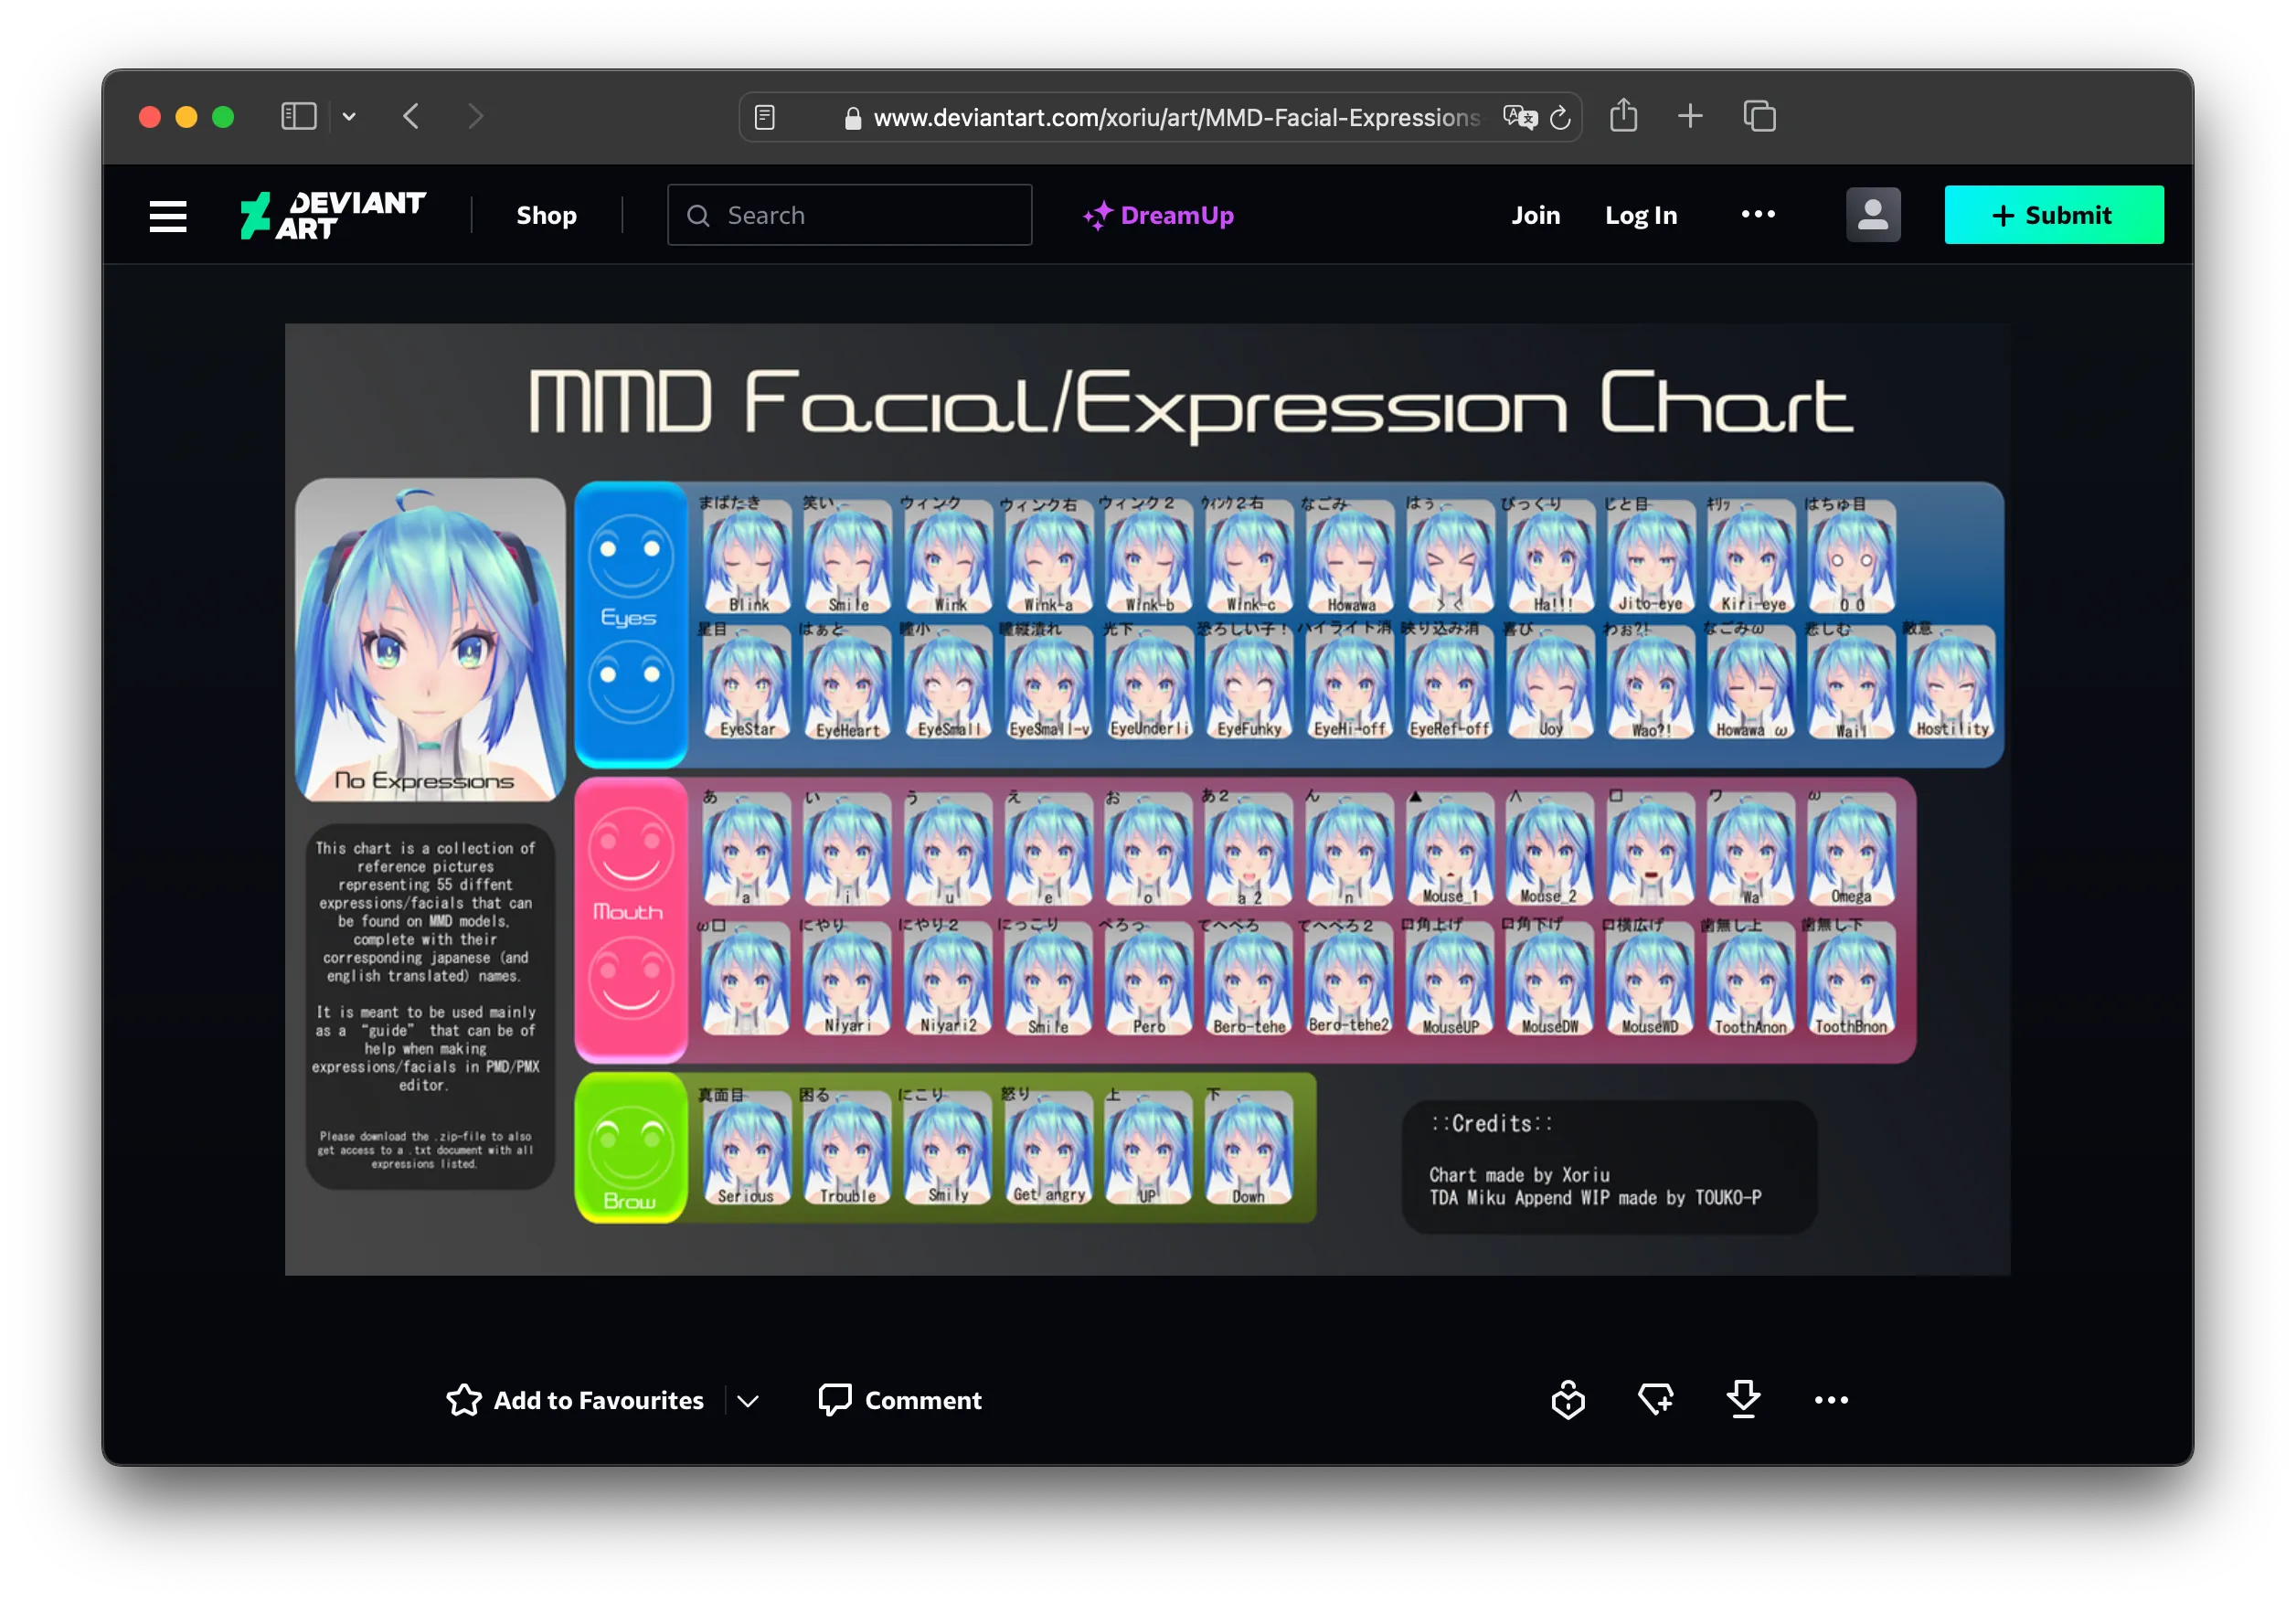
Compare this chart to the expressions on your avatar to decide how each MMD morph corresponds to expressions on your avatar.
Write Defaults and other common issues
Before you test your avatar, there’s a few common issues you should be aware of that might prevent avatars working in MMD worlds:
- One or more animator states in your avatars has Write Defaults disabled
- The object representing your avatar’s face is not called “Body”
- The object representing your avatar’s face is not directly placed underneath your avatar in the hierarchy
From version 1.2 onwards (currently in beta), Make It MMD tries to offer automatic fixes for the first two problems.
The third problem can be solved by using Modular Avatar’s “MA Bone Proxy” component. More documentation to be added.
Testing and uploading your avatar
Once you’ve set MMD facial expressions and resolved common issues, you’re ready to upload and try your avatar!